
Mark 2 Prototype
Task 11 - Mark 2 Knife build - Updated CAD file
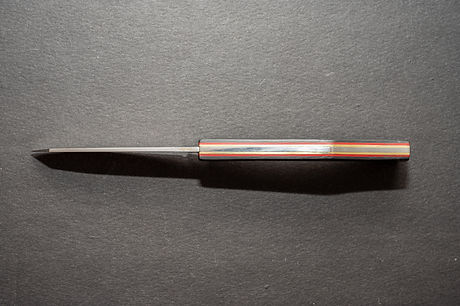
After Making a knife to sell to build up material funds for the continuation of my project (see images below) and also to better my building skills, I tested the knife outside to carve some wood to see how the knife holds an edge. When doing this I dropped the knife in the long grass and it took me some time to find it... this made me think about my choice of materials again, I needed something that would be higher contrast to natural colours. Given this information I updated my CAD design.


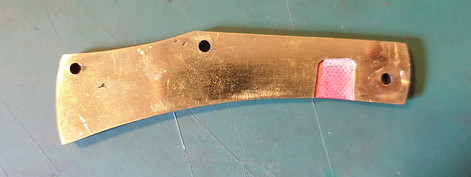
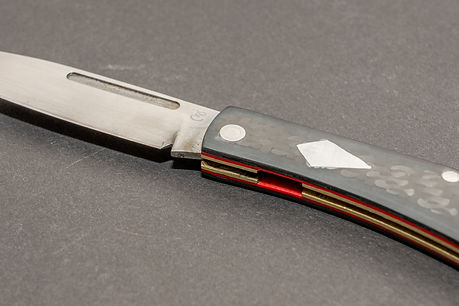
As can be seen by the exploded CAD model of the knife build, I have added bright red layers of G10 (Dyed fiberglass and resin board) this will add to the contrast of the build when looking at the relatively slim profile from above. Carbon fiber was also used as it was recommended by Rob in the CNC department that I should find a handle material that comes in standard thicknesses, this would make it much easier and faster to CNC cut. The Carbon fiber also contrasts much better with natural materials as it can be polished to a semi gloss shine, and the regular pattern of the carbon fiber on the handle will also allow it to stand out against natural material found of a forest floor for example. I also relieved the Brass material with two square cuts, this allows the action when closing the knife to be much smoother and also stops scratch marks from building on the thicker portion of the blade.

Task 11.1 - Mark 2 Knife build - CNC Parts
Using the cad files I had made for the 2D engineering drawings, I turned the files into STEP files and sent them to be CNC cut. This means that the parts for the handles - both brass and carbon fiber will be cut very precisely.

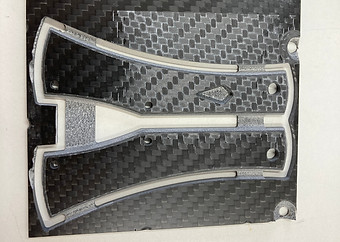

Due to the woven nature of carbon fiber there were a few issues with CNC machining, where the back section was slightly chipped out when the tool was chamfering the edge, this is most likely due to the tool speed being set too high, causing the strands of carbon fiber to 'grab' the end mill and allow the CNC to pull out the chips. Luckily the back section of the knife is not a critical dimension for the function of the knife, this means that the chipped out areas can be sanded past and resolved in the final build. The reason for switching to carbon fiber was as follows - the linen micarta I was originally using only came in thicknesses of 8-10mm, the scales on the cad model were 3mm thick, this was a large amount of material that would be wasted and therefore would not be cost effective nor environmentally friendly to use in this instance. The material also contained slight irregularities in the bonding of layers of fabric, this caused large chip-outs of material when milling, these chips were large enough to render the structural integrity of the scales un-sound. The Brass liner material was also cut on the CNC machine, there were no issues with milling these parts accurately and well with very minimal finishing needed on the edges.
Task 11.2 - Hand Milled Parts
The University CNC machine in the Design department is not able to cut ferrous metals due to it not having any form of liquid cooling that can be applied to the end mill, and the Engineering department CNC machine is currently undergoing maintenance, this means I will have to do the knife blade and back spring using the manual milling machine.


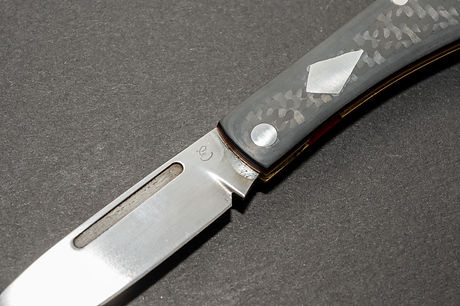
Task 11.3 - Mark 2 Knife Final assembly - Detail Photography and prototype comparison video
Here is the finally assembled knife, this is the final version I am going with as I am very happy with the outcome of this product.


Task 11.4 - Booklet

This is the working prototype of the booklet that will be made to accompany the kit that I am making for the Children to experience outdoor learning. This prototype features some of the graphic elements and colour pallet of the final concept, the page content and order is 99% in completion.
The booklet will be around A5 paper size and will be printed on some type of waterproof paper.
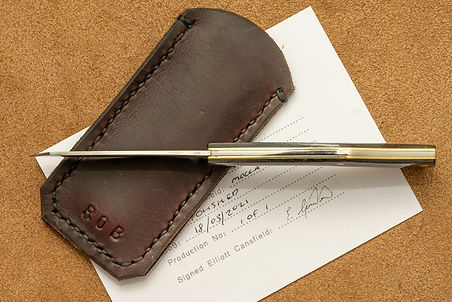
Task 11.5 - Leather Kit Organizer


The above miniture leather organiser was made to test the process of sewing multiple layers of leather together. It was also done to see how the leather would react to different sized objects into the solts.
Below I have rendered drawings of the final organiser design in Photoshop, this is to help plan the pattern sizes needed for all of the leather components.

